How To Use Minelab XChange 2 for EDITING - Illustrated Tutorial, page 2
1. Create and Edit Minelab CTX 3030 DISCRIMINATION PATTERNS on Your PC
To edit Discrimination patterns using the XChange 2 application, you need to do the following steps:
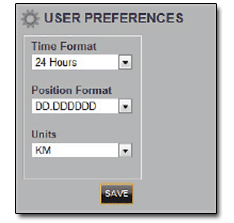
1) Install XChange 2 software on your PC or laptop (page 53 of the CTX 3030 Instruction Manual, page 4 of the XChange 2 User Manual). When you install the XChange 2 application, set your User Preferences as required:
1. Set options for 'Time', 'Position', 'Format' and 'Units' using the corresponding drop-down menus.
2. Click on the 'SAVE' button to save your preferences.
2) Start the XChange 2 on your PC or laptop by double clicking the "XChange 2 Application" icon![]() on your desktop, or open Start Menu and navigate to: All Programs > Minelab > XChange 2.
on your desktop, or open Start Menu and navigate to: All Programs > Minelab > XChange 2.
NOTE: The XChange 2 application can be used without logging in. 'Logging in' (page 11 of the XChange 2 User Manual) is required only when you use the mapping features.
This is the first screen displayed when you start the CTX 3030 XChange 2:
Opening Screen of XChange 2
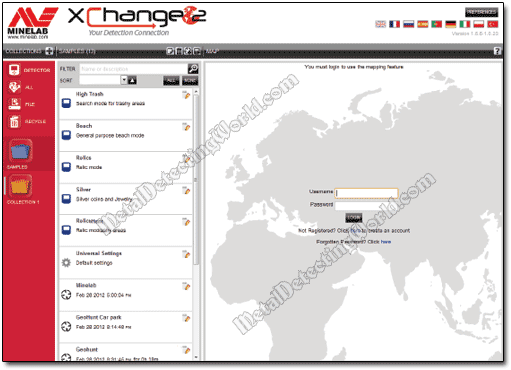
NOTE: Before creating or editing Discrimination patterns and/or Tone ID Profile of your User Search Mode in the XChange 2 application, you must transfer your User Mode from your CTX-3030 to your PC. You can move your User Mode into either of two folders within the XChange 2 application: the 'SAMPLES' folder ![]() (located in the red vertical area - 'Special Collections' section), which contains all factory-preset User Modes, or a User Collection which you need to create beforehand (it will be also displayed in the 'Special Collections' section as shown on a picture above).
(located in the red vertical area - 'Special Collections' section), which contains all factory-preset User Modes, or a User Collection which you need to create beforehand (it will be also displayed in the 'Special Collections' section as shown on a picture above).
If you wish to use the 'SAMPLES' folder, skip the next step and proceed to Step 4.
3) Create A Collection in XChange 2
A COLLECTION is like a FOLDER on your PC. All User Modes copied from the detector must reside in a COLLECTION that you create, and each Collection should be given a name and allocated an icon. You can create as many Collections as you wish.
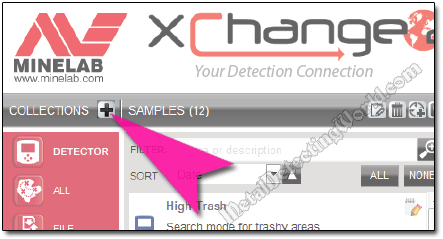
To create a Collection in XChange 2,
• press ![]() button on the Collection Controls bar:
button on the Collection Controls bar:
• when the Collection screen is displayed, name the Collection by typing its name in the open window.
Collection Screen
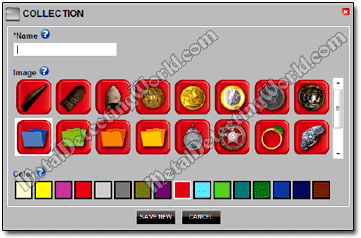
You may want to select an image for the collection, and then click SAVE. The newly created collection will appear in User Collections.
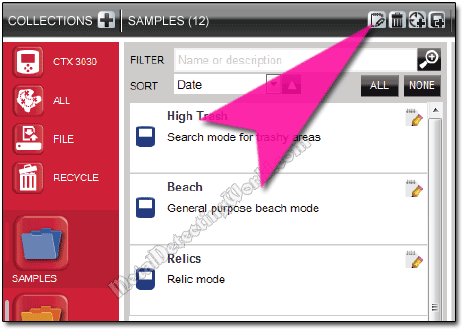
To edit a Collection, select the collection and click on the "Edit Collection" button ![]() on the Collection Controls bar
on the Collection Controls bar
After you change the details of the collection, click SAVE.