How To Use Minelab XChange 2 for EDITING - Illustrated Tutorial, page 3
Upload User Mode from CTX 3030 Metal Detector to XChange 2
(...CONTINUED from Previous Page)
4) Connect CTX-3030 metal detector to your PC or laptop:
• Insert one end of the USB cable into a USB connection facility (page 2 of the CTX 3030 Instruction Manual) on your CTX-3030, and the other end into a USB port of your PC or laptop. Although CTX 3030’s transmitter is switched off while connected to a PC, make sure the coil is not located next to any large metal objects.
• Turn on your CTX-3030 metal detector. A confirmation message "USB Connected" will be displayed on the CTX-3030 display. You can now use the XChange 2 application.
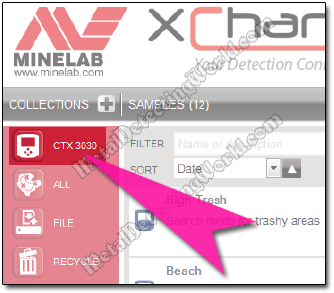
When your detector is connected to your computer, the detector’s name - CTX 3030, appears next to the 'Detector Collection' icon/button in the red vertical rectangle - 'Special Collections' section, situated in the left part of the XChange-2 window and under the 'COLLECTIONS' title on the black horizontal "Collection Controls" bar:
'Detector Collection' Icon/Button with Detector's Name "CTX 3030" Next To It
UPLOAD YOUR USER MODE FROM CTX 3030 TO XChange 2 FOLDER
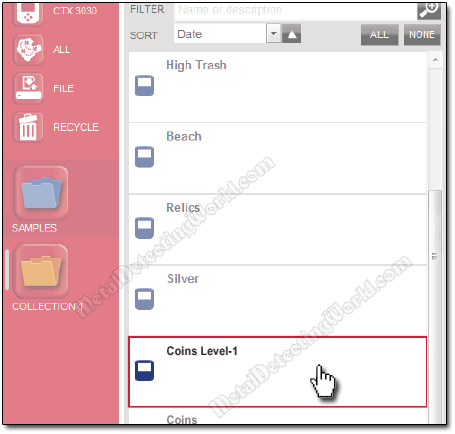
5) Click on the 'Detector Collection' button ![]() to open the Item List that contains all User Modes, including the factory preset Modes, available in your CTX 3030 metal detector.
to open the Item List that contains all User Modes, including the factory preset Modes, available in your CTX 3030 metal detector.
To transfer your User Mode, "Coins Level-1" in this instance, from your CTX-3030 to the 'SAMPLES' Collection, by using "Drag and Drop" operation:
6) Move the cursor onto the Item Summary - "Coins Level-1" bin - a rectangle in the Item List. The default cursor will change to a hand cursor ![]() , and the summary of the "Coins Level-1" User Mode will be red-outlined.
, and the summary of the "Coins Level-1" User Mode will be red-outlined.
List of Items in Your CTX 3030 (item descriptions are not shown)
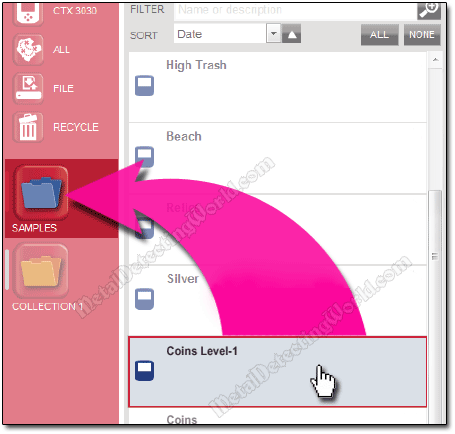
7) Click on the "Coins Level-1" bin (when it is selected, it will be highlighted in blue) and hold down the mouse button to "grab" the bin, then "drag" it to the "blue folder" icon/button - 'SAMPLES', as shown below, and "drop" the bin there by releasing the button.
Transfer Your User Mode from CTX 3030 to XChange 2
All other User Modes stored in your CTX-3030 can be transferred to the XChange 2 the same way.
NOTE: Presence of all factory-preset User Modes - 'COINS', 'BEACH', 'RELICS', 'SILVER' and 'HIGH TRASH' in the XChange 2 application will give you an opportunity to use them as the basis for creating your new User Modes according to the corresponding metal detecting conditions alike.
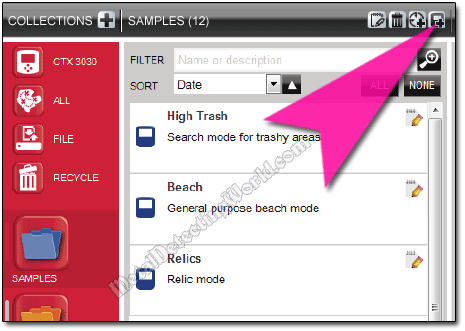
• 7-1) You can CREATE A NEW USER MODE in existing User Collection by clicking on the "New User Mode" button ![]() located on the "Collection Controls" bar.
located on the "Collection Controls" bar.
The User Mode editor (shown on a picture in Step 10 on next page) will be displayed. Your new User Mode MUST be given a name before it can be saved. Type a name for your mode into the Name field and click the "Save New" button ![]() .
.
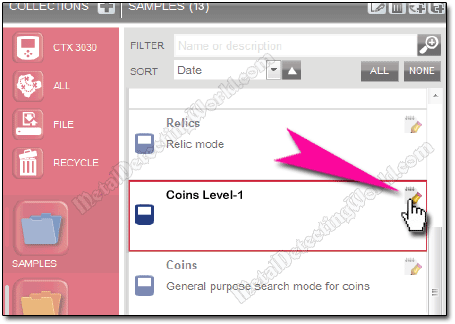
8) Click on the 'SAMPLES' icon/button ![]() to open the 'Samples' folder and vew the contents of the Item List - a list of all User Modes transferred into the XChange 2 from your CTX 3030. There, you will find (scroll down if necessary) a rectangular Item Summary for the "Coins Level-1" User Mode.
to open the 'Samples' folder and vew the contents of the Item List - a list of all User Modes transferred into the XChange 2 from your CTX 3030. There, you will find (scroll down if necessary) a rectangular Item Summary for the "Coins Level-1" User Mode.
9) Move the cursor onto the Item Summary. The default cursor will change to a hand cursor ![]() , and the "Coins Level-1" bin will be red-outlined.
, and the "Coins Level-1" bin will be red-outlined.
"Coins Level-1" Mode in the Item List of 'SAMPLES' Folder
